HDR Color Grading: What You Need to Know
HDR Color Grading: What You Need to Know
HDR color grading gives videos a brighter, more dynamic look by balancing highlights, shadows, and colors. It uses advanced tools and techniques to create visuals with deeper contrast and richer colors, especially for HDR-capable displays. Here's what you need to know:
- HDR vs. SDR: HDR supports over 1 billion colors (10-bit) and higher brightness levels (1,000+ nits), compared to SDR's 16.7 million colors (8-bit) and 300–400 nits brightness.
- Hardware: Requires HDR-capable monitors (1,000+ nits, Rec. 2020 support) and calibration tools for accuracy.
- Software: Tools like DaVinci Resolve Studio ($295) and VEGAS Pro ($19.99/month) offer HDR workflows.
- Workflow: Start with proper project settings, adjust color and brightness using scopes, and export with HDR-compatible formats like HDR10 or HLG.
HDR content enhances video quality for platforms like YouTube and streaming services. Even mobile creators can produce HDR videos using apps like Evelize, which simplifies recording and editing on smartphones. Whether you're a beginner or experienced, HDR workflows can make your videos stand out.
Master Cinematic HDR Color Grading Like A Pro - DaVinci Resolve Tutorial
What Is HDR and Why Does It Matter?
High Dynamic Range (HDR) is a game-changer in video technology. It allows for capturing and displaying a much broader range of brightness, contrast, and color compared to Standard Dynamic Range (SDR). Think of it as moving from a dimly lit room to a bright, panoramic view where every detail comes to life.
HDR Basics for Video Production
HDR elevates video production by widening the dynamic range - the difference between the darkest blacks and the brightest whites. Unlike SDR's 8-bit color depth, which supports 16.7 million colors, HDR uses a 10-bit color depth, unlocking over 1 billion colors. This expanded range operates within advanced color spaces like Rec. 2020 and DCI-P3, ensuring vibrant and true-to-life visuals.
Streaming platforms have fully embraced HDR, with many original shows and movies now mastered in this format. For instance, nature documentaries like Our Planet highlight HDR’s ability to reveal intricate details, whether it’s the shimmer of sunlight on water or the textures within deep shadows. This technology also enables precise color grading, ensuring every scene feels rich and impactful.
Benefits of HDR for Content Creators
For content creators, HDR opens up new creative horizons. It captures delicate lighting and color variations, preserving details that make scenes more compelling. Whether it’s the golden tones of a sunset or the deep shadows of a dimly lit room, HDR ensures these elements enhance storytelling rather than being lost in translation. The result? A visually immersive experience that keeps audiences hooked.
Next, let’s break down the technical differences between HDR and SDR that make these creative advantages possible.
HDR vs. SDR: Key Differences
Understanding the distinctions between HDR and SDR is essential for making the right production choices. Here’s a quick comparison:
| Feature | HDR (High Dynamic Range) | SDR (Standard Dynamic Range) |
|---|---|---|
| Peak Brightness | 1,000+ nits | 300–400 nits |
| Color Depth | 10-bit (over 1 billion colors) | 8-bit (16.7 million colors) |
| Color Space | Rec. 2020 / DCI-P3 | Rec. 709 |
| Dynamic Range | Wide (deep blacks, bright highlights) | Limited (flatter contrast) |
| Viewer Experience | Lifelike, immersive | Standard, less vibrant |
While HDR does require specialized equipment and software to handle its advanced color spaces and brightness levels, the payoff is worth it. Investing in HDR technology ensures your content stands out with visuals that captivate and engage viewers like never before.
Tools You Need for HDR Color Grading
Achieving professional HDR results requires a specific mix of hardware and software. HDR color grading is more demanding than standard video editing, as it involves working with expanded color spaces and higher brightness levels to create stunning visuals. Here's a breakdown of the essential tools you'll need to get started.
Hardware Requirements for HDR Grading
The cornerstone of any HDR grading setup is your monitor. An HDR-capable monitor is non-negotiable - it needs to accurately display the expanded dynamic range and wide color gamut of HDR content so you can make precise adjustments to highlights, shadows, and colors. Look for a monitor with:
- A peak brightness of at least 1,000 nits
- Wide color gamut support, such as Rec. 2020 or DCI-P3
- A 10-bit (or higher) panel
- Support for HDR standards like HDR10, HLG, and Dolby Vision
- Calibration capabilities to ensure consistent results
Professional HDR reference monitors typically cost between $1,000 and $5,000 or more, depending on the brand and features. Beyond the monitor, your computer must be up to the task. This means having plenty of RAM, a powerful graphics card, and fast storage to handle the larger file sizes and complex workflows that HDR video demands.
To ensure your monitor displays colors and brightness levels accurately, you'll also need calibration tools. Devices like the X-Rite i1Display Pro or Datacolor SpyderX are excellent options, typically priced between $150 and $300.
Once your hardware is in place, the next step is selecting software that can fully leverage HDR's capabilities.
Software Options for HDR Grading
HDR grading software provides the tools you need to work with expanded color spaces and dynamic ranges. Two standout options are DaVinci Resolve Studio and VEGAS Pro, both of which are equipped with robust HDR workflows and fine-tuning controls for your footage.
- DaVinci Resolve Studio: Widely regarded as the industry standard, this software offers advanced HDR workflows, comprehensive color management, and monitoring tools to handle multiple HDR formats. It’s available for a one-time purchase of $295.
- VEGAS Pro: Known for its user-friendly interface, VEGAS Pro is ideal for creators looking for a simpler approach. Subscriptions start at $19.99 per month, or you can purchase a perpetual license for $399.
For mobile creators, Evelize is a powerful option. It supports HDR, 4K resolution, 60 FPS recording, and comes with integrated editing tools. Features like a customizable teleprompter and social media presets make it a versatile tool for producing high-quality HDR content on the go.
| Feature | DaVinci Resolve | VEGAS Pro |
|---|---|---|
| Platform | Windows, macOS, Linux | Windows |
| HDR Workflow | Advanced, industry standard | User-friendly |
| Price | $295 (Studio) | $19.99/mo or $399 |
| Monitor Calibration | Supported | Supported |
| Target User | Professionals, studios | Prosumer, professionals |
Why Monitor Calibration Matters
Calibrating your monitor is crucial for ensuring accurate color and brightness, which prevents errors in your grading decisions and maintains consistency across different viewing devices. Calibration involves using specialized hardware to align your monitor to industry standards, creating a reliable baseline for your work.
Many professionals calibrate their monitors regularly - weekly or monthly - especially before tackling major projects. This practice ensures their creative vision translates accurately across various platforms and environments. Additionally, grading software often includes tools like waveform and vectorscope monitors to help avoid issues like clipped highlights or crushed shadows, keeping your HDR work technically sound.
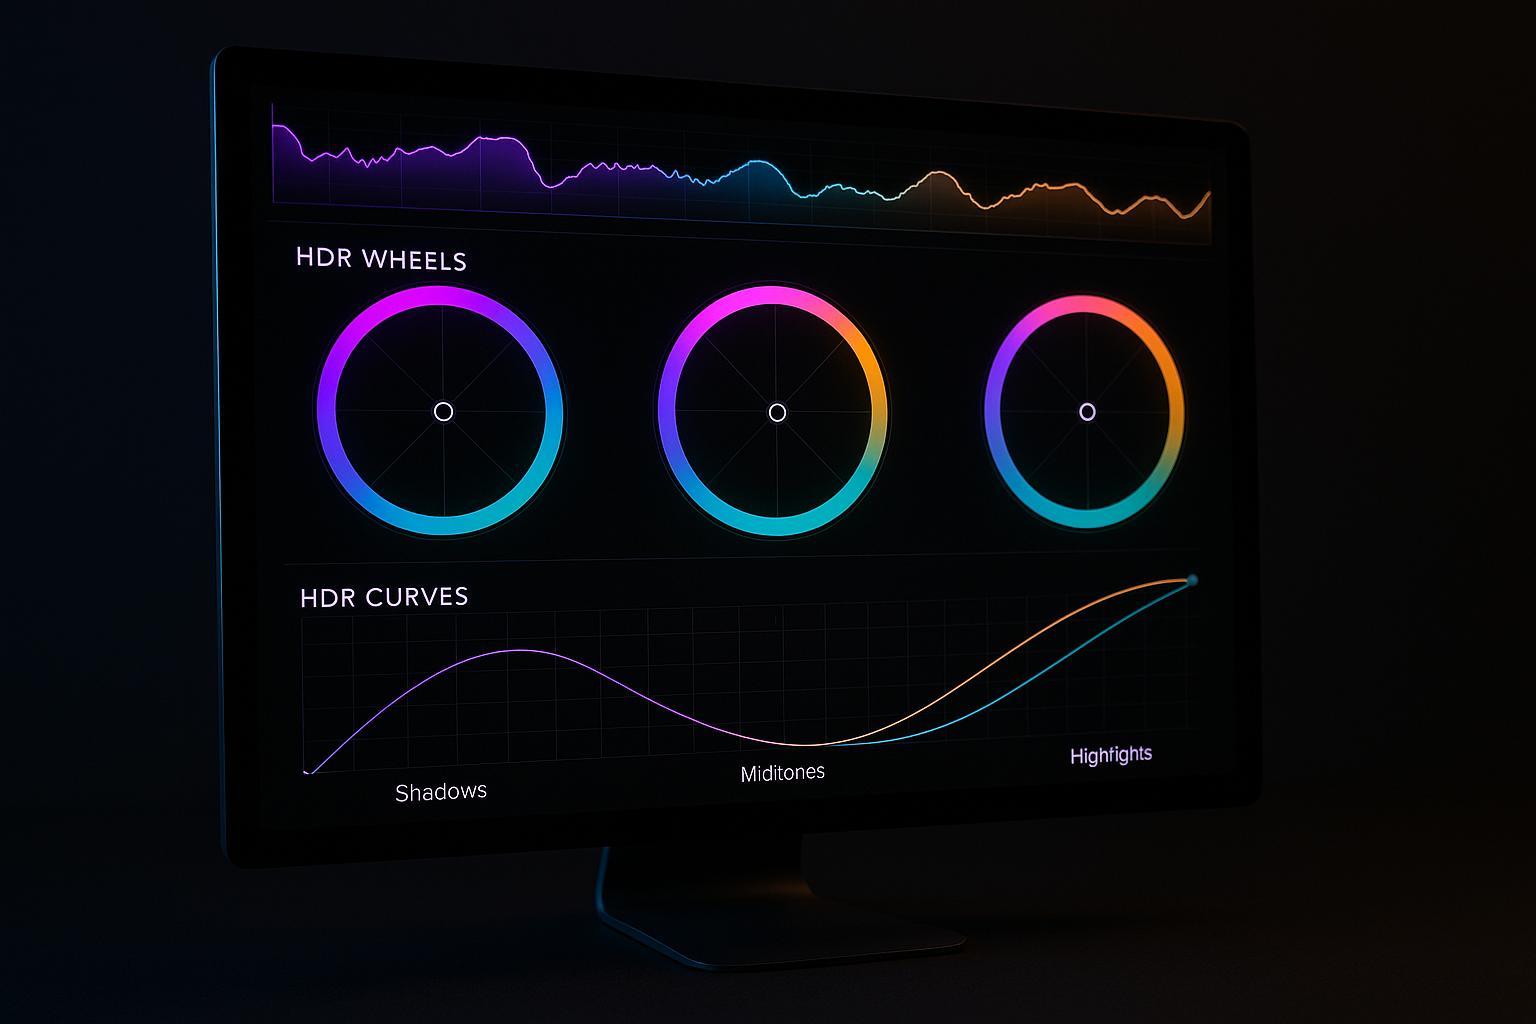
HDR Color Grading Workflow
When working with HDR footage, your approach needs to cater to its extended dynamic range and broader color gamut. This means carefully setting up your project, making precise color adjustments, and following proper export procedures to retain the quality HDR offers. Let’s break it down, starting with project setup.
Setting Up Your HDR Project
The first step is aligning your project settings with your HDR footage. In VEGAS Pro, add your HDR media to the timeline and ensure the project settings match the footage specifications. Go to File > Properties, click the Video tab, and choose the appropriate HDR mode. Your choice between HDR10 and HLG formats will shape the workflow: selecting HDR10 automatically adjusts the pixel format to 32-bit Floating Point (Full Range) and activates the ACES color space, while HLG modifies the View Transform accordingly.
Next, assign the correct Input Device Transform (IDT) to your footage. Right-click the media thumbnail in the Project Media window, choose Properties, and select the corresponding color space - commonly Rec. 2020 for HDR or Rec. 2020 HLG (1000 nits) for HLG footage. If you're using Evelize for mobile HDR recording, the app simplifies this process by handling these settings automatically, allowing you to focus on the creative aspects of your project.
Once your project setup is complete, you’re ready to move on to color corrections and HDR-specific adjustments.
Color Correction and HDR Adjustments
Now that your project is configured, it’s time to fine-tune the visuals. Start by importing your HDR footage and confirming that your project settings align with its color space, such as Rec. 2020 or DCI-P3. Begin with technical corrections like exposure, white balance, and contrast to establish a balanced, natural look. Then, use HDR-specific tools to refine highlights, shadows, and midtones.
Accurate brightness management is key, and video scopes are your best friend here. In VEGAS Pro, open the Video Scopes window by clicking the Color Grading button or navigating to View > Window > Video Scopes. Enable both the Enable ST.2084 HDR Scope and 10-bit Scale options in the settings to activate HDR monitoring. These tools help you avoid clipping highlights or crushing shadows.
When grading, use the HDR-specific controls in your software’s Color Grading panel. Not all tools are optimized for HDR, so sticking with these ensures you preserve contrast and detail in critical areas.
Exporting HDR Content
Once your color grading is complete, it’s time to export your HDR masterpiece. In your editing software, go to File > Render As, where you’ll see only the formats that support HDR.
Before exporting, ensure your footage is prepped. For example, in DaVinci Resolve Studio, placing the graded material on the first video layer (V1) is recommended before running analysis and exporting. This step helps avoid technical hiccups and ensures the best quality.
When choosing export settings, consider the platform and viewing environment. VEGAS Pro’s direct delivery feature simplifies HDR export for platforms like YouTube by automatically managing HDR metadata. Key factors to keep in mind include:
- Color Space: Use DCI-P3 for broad compatibility or Rec. 2020 for a wider color gamut.
- Bit Depth: Stick to 10-bit or higher to maintain HDR’s dynamic range.
- HDR Metadata: Ensure metadata is included to retain HDR properties.
- Platform Compatibility: Check the specific requirements of your target platform.
| Export Consideration | Recommendation |
|---|---|
| Color Space | DCI-P3 for compatibility; Rec. 2020 for quality |
| Bit Depth | 10-bit or higher |
| HDR Metadata | Include metadata |
| Platform Compatibility | Verify platform requirements |
Paying close attention to these settings ensures your HDR content retains its quality and dynamic range, no matter where it’s viewed.
sbb-itb-4a26d6a
Tips for Consistent HDR Results
Creating stunning HDR color grading isn't just about having the right software or equipment - it’s about following consistent practices that ensure reliable and professional results every time. Here are some techniques to help you maintain quality and sidestep common mistakes.
Keeping Colors Consistent Across Scenes
Start by selecting a reference shot that captures the overall look you want for your project. Think of this as your visual benchmark for color, contrast, and brightness. Use it to guide adjustments across all your scenes, ensuring a cohesive final product.
Before diving into color tweaks, tackle luminance grading first. Matching the brightness levels of your shots lays a solid foundation for further adjustments. Many grading tools offer split-screen features, allowing you to compare your reference shot side-by-side with the scene you’re working on. This makes it easier to fine-tune color values with precision.
Using color charts during your grading sessions can also improve accuracy. These charts act as objective guides for maintaining consistent color tones. Additionally, applying a master LUT (Look-Up Table) at the start of your grading process provides a uniform baseline. From there, you can refine individual shots while preserving a consistent visual style.
Common HDR Mistakes to Avoid
A common pitfall in HDR grading is clipping highlights. This happens when bright areas lose detail and turn completely white because the luminance exceeds what the display can handle. Most consumer HDR screens top out at around 1,000 nits. Similarly, crushing shadows - pushing dark areas too far - can erase important details, leaving them as solid black. Overcorrecting either highlights or shadows can also introduce noise, particularly in darker regions.
Another mistake is using non-HDR-compatible tools, which can compromise your work. For example, many editing programs require a dedicated HDR grading panel to properly handle adjustments. Relying on standard color tools may lead to inaccurate results. To avoid these issues, regularly check your equipment and ensure it’s calibrated for HDR workflows.
Regular Equipment Checks and Calibration
Your monitor is your most critical tool for HDR grading. If it’s not calibrated correctly, it can misrepresent colors and brightness levels, leading to inconsistent results. Make it a habit to calibrate your monitor monthly or before starting major projects, especially if your workspace lighting changes.
Hardware calibration tools are your best bet for accuracy, as they create custom profiles that align your monitor with industry standards. Equally important is ensuring your project settings match your footage specifications. Working in the wrong color space - like using Rec. 709 instead of Rec. 2020 - can cause color shifts and limit your grading options. These checks ensure your setup meets HDR requirements.
| Equipment Check | Frequency | Key Focus Areas |
|---|---|---|
| Monitor Calibration | Monthly or per project | Color accuracy, brightness levels |
| Project Settings | Per project/new footage | Color space, bit depth, HDR format |
| Workspace Lighting | When conditions change | Impact of ambient light on perception |
For mobile creators using Evelize, the app’s HDR support and customizable settings simplify the process of achieving consistent results, even while working remotely. Although Evelize automates many technical aspects, it’s still a good idea to check your mobile device’s display calibration and use HDR-capable preview screens to make sure your work meets professional standards.
How Evelize Supports HDR Video Creation

Evelize takes the complexities of HDR video production and simplifies them into a single, mobile-friendly app. Traditionally, creating professional HDR videos meant relying on expensive cameras, specialized monitors, and complicated desktop software. Evelize flips the script by putting HDR production tools directly on your smartphone, making high-quality content creation more accessible than ever.
Evelize HDR Features
Evelize packs a suite of HDR recording and editing tools into your mobile device, allowing you to shoot in 4K at 60 FPS with enhanced brightness, contrast, and color depth. These features bring desktop-level precision to the palm of your hand, enabling creators to achieve professional results no matter where they are.
The app includes a customizable teleprompter, helping you deliver scripts naturally while keeping eye contact with your audience. Evelize also offers powerful editing tools tailored for HDR content, including options for color correction, exposure adjustments, and contrast fine-tuning. Support for LUTs (Look-Up Tables) ensures consistent color grading across scenes or projects, while real-time previews let you see changes instantly. This helps avoid common HDR issues like uneven brightness or color shifts between shots.
Evelize doesn’t stop at editing - it also simplifies the technical side of HDR production. Integrated script tools help you organize your projects, and pre-configured presets ensure that your videos are optimized for platforms like YouTube. These presets eliminate headaches during upload or playback, ensuring your HDR content looks flawless on supported devices.
Benefits for Mobile Video Creators
Mobile HDR production is becoming the new norm, and Evelize is leading the charge. By 2025, more than 80% of new smartphones in the U.S. are expected to support HDR recording. This shift makes it easier than ever for creators to produce high-quality videos. Plus, HDR videos tend to perform better on social media, with up to 30% higher engagement rates. For creators looking to grow their audience, the benefits are clear.
Evelize allows creators to handle every step of the HDR video process - scripting, recording, editing, and publishing - entirely on their mobile device. This eliminates the need for expensive equipment and complex setups, making it a practical option for solo creators or small teams working on tight budgets.
Take, for instance, a content creator filming a product review. With Evelize, they can write their script, record in 4K HDR with the teleprompter, and edit the footage to ensure perfect color and brightness. Using the app’s YouTube HDR preset, they can export a polished video that maintains its high dynamic range and visual impact, ready for viewers on any compatible device.
Evelize also stays up to date with current HDR standards like HDR10 and HLG, ensuring compatibility with modern TVs, monitors, and streaming platforms. Regular updates keep the app in sync with the latest mobile devices capable of HDR capture and playback.
Here’s a quick comparison to show how Evelize stacks up against traditional HDR workflows:
| Feature | Traditional Workflow | Evelize Mobile Workflow |
|---|---|---|
| Equipment Cost | $5,000+ for camera, monitor, software | Smartphone + $7.99/month subscription |
| Setup Time | 30–60 minutes | 2–3 minutes |
| Learning Curve | Weeks to months | Hours to days |
| Portability | Studio-bound | Fully mobile |
| HDR Monitoring | Requires calibrated HDR monitor | Built-in mobile HDR preview |
Evelize even helps you fine-tune your mobile workflow. The app encourages users to calibrate their device screens for accurate color grading and use the real-time preview to monitor exposure and color adjustments. Built-in guides offer tips to avoid common HDR pitfalls, such as overexposure or color clipping.
While it doesn’t replace traditional setups entirely, Evelize offers a flexible, lightweight alternative for creators who need professional results without the traditional hassle. Whether you’re a seasoned videographer or a hobbyist, Evelize makes HDR production faster, easier, and more portable than ever.
Conclusion: Getting Started with HDR Color Grading
HDR color grading can transform your videos, bringing out the best in both bright highlights and deep shadows. By enhancing the dynamic range, HDR delivers visuals that feel more vibrant and true to life, preserving intricate details in areas that might otherwise be lost.
To dive into HDR grading, it’s essential to start with the basics. From setting up your project correctly to fine-tuning color adjustments, these steps form the backbone of your workflow. The good news? You don’t need an expensive setup to get started. Affordable software options are available, and with the right tools - like calibrated monitors and footage shot in 10-bit or 12-bit color depth - you can achieve smooth, professional results. Tools like waveform monitors and vectorscopes also help ensure your colors stay accurate and free of technical issues.
Using log or raw footage is a great way to maximize dynamic range. Begin by setting your project to the correct color space and calibrating your monitor for precision. Start with basic color correction, then layer in HDR-specific adjustments. Following industry standards like Rec. 2020 and ST.2084 ensures your content will look great across various devices and platforms.
As HDR becomes more common across streaming platforms, filmmaking, and even mobile content creation, the opportunities for creators are expanding. With HDR-capable monitors and software becoming more affordable, creators at all levels can now explore this once-exclusive technology.
If you’re just starting out, try experimenting with the tools you have and sample HDR footage to practice. Focus on learning the essentials: color correction, monitor calibration, and exporting in HDR formats. Begin with small projects to build your confidence, and then gradually explore more advanced techniques.
Whether you’re using a traditional desktop setup or mobile solutions like Evelize, the key is to start practicing. HDR color grading is a skill that grows with experience, and the sooner you begin, the sooner you’ll unlock its full potential. With time and practice, you’ll be creating stunning HDR content that stands out on any platform.
FAQs
What’s the difference between HDR and SDR in video production and viewer experience?
HDR, or High Dynamic Range, and SDR, or Standard Dynamic Range, differ significantly in how they manage brightness, contrast, and color. HDR stands out by delivering a broader range of brightness levels and more vivid colors, resulting in visuals that feel more lifelike and engaging. On the other hand, SDR operates within a narrower range, often leading to visuals that appear less dynamic and somewhat flat.
With HDR, creators can craft videos that feature deeper blacks, brighter highlights, and more detailed, vibrant colors. This improvement becomes particularly striking when viewed on modern screens designed to support HDR technology, elevating the overall viewing experience.
What tools do I need to start HDR color grading, and how can I achieve accurate results?
To dive into HDR color grading, you'll need a few key pieces of equipment and software. Start with a high-quality monitor that supports HDR10 or Dolby Vision - this is crucial for accurately displaying the complete range of colors and brightness levels. Pair that with a computer equipped with a powerful GPU, as HDR workflows demand significant processing power.
When it comes to software, opt for professional tools like DaVinci Resolve or Adobe Premiere Pro, both of which support HDR workflows. Also, make sure your footage is shot in formats that preserve dynamic range, such as RAW or Log.
For precision, regularly calibrate your monitor using a colorimeter and stick to industry-standard color spaces like Rec. 2020 or Rec. 709. Don’t overlook your workspace - proper lighting can minimize distractions and help you achieve consistent, accurate results.
How can mobile creators use HDR to make their videos look more professional?
Creators using mobile devices can elevate their videos with HDR technology, delivering richer colors, sharper contrasts, and lifelike visuals. Apps such as Evelize, which support HDR, empower users to capture and edit videos with exceptional clarity and vibrancy. Whether you're crafting content for social media, marketing campaigns, or personal projects, HDR can help your videos appear polished and professional.
Related Posts
Ready to Elevate Your Content?
Try Evelize for free and experience the easiest way to create, edit, and share professional videos. Script writing, teleprompter, and powerful video tools - all in one app!
