Ultimate Guide to Creating Professional Videos at Home
Ultimate Guide to Creating Professional Videos at Home
Creating high-quality videos at home is easier than you think. Whether you're a content creator or a business owner, professional-looking videos can boost your online presence and audience engagement. Here's how to get started:
- Why It Matters: Professional videos build trust, keep viewers engaged, and can drive sales. Home production saves costs and allows for flexibility.
- Challenges: Common issues include poor lighting, bad audio, and cluttered spaces, but these can be fixed with the right tools and techniques.
- What You’ll Need:
- Camera: Start with a smartphone or upgrade to a mirrorless or DSLR camera.
- Audio: Use lavalier, shotgun, or USB microphones for clear sound.
- Lighting: LED panels, ring lights, or softboxes improve video quality.
- Teleprompters: Tools like Evelize help deliver scripts smoothly and professionally.
- Pro Tips:
- Use the rule of thirds for framing.
- Keep your camera at eye level.
- Edit with tools like DaVinci Resolve, iMovie, or Evelize for a polished finish.
With these basics, you can create polished videos that stand out - no expensive studio required.
🎥 How to Create a Professional Home Studio! 🎥
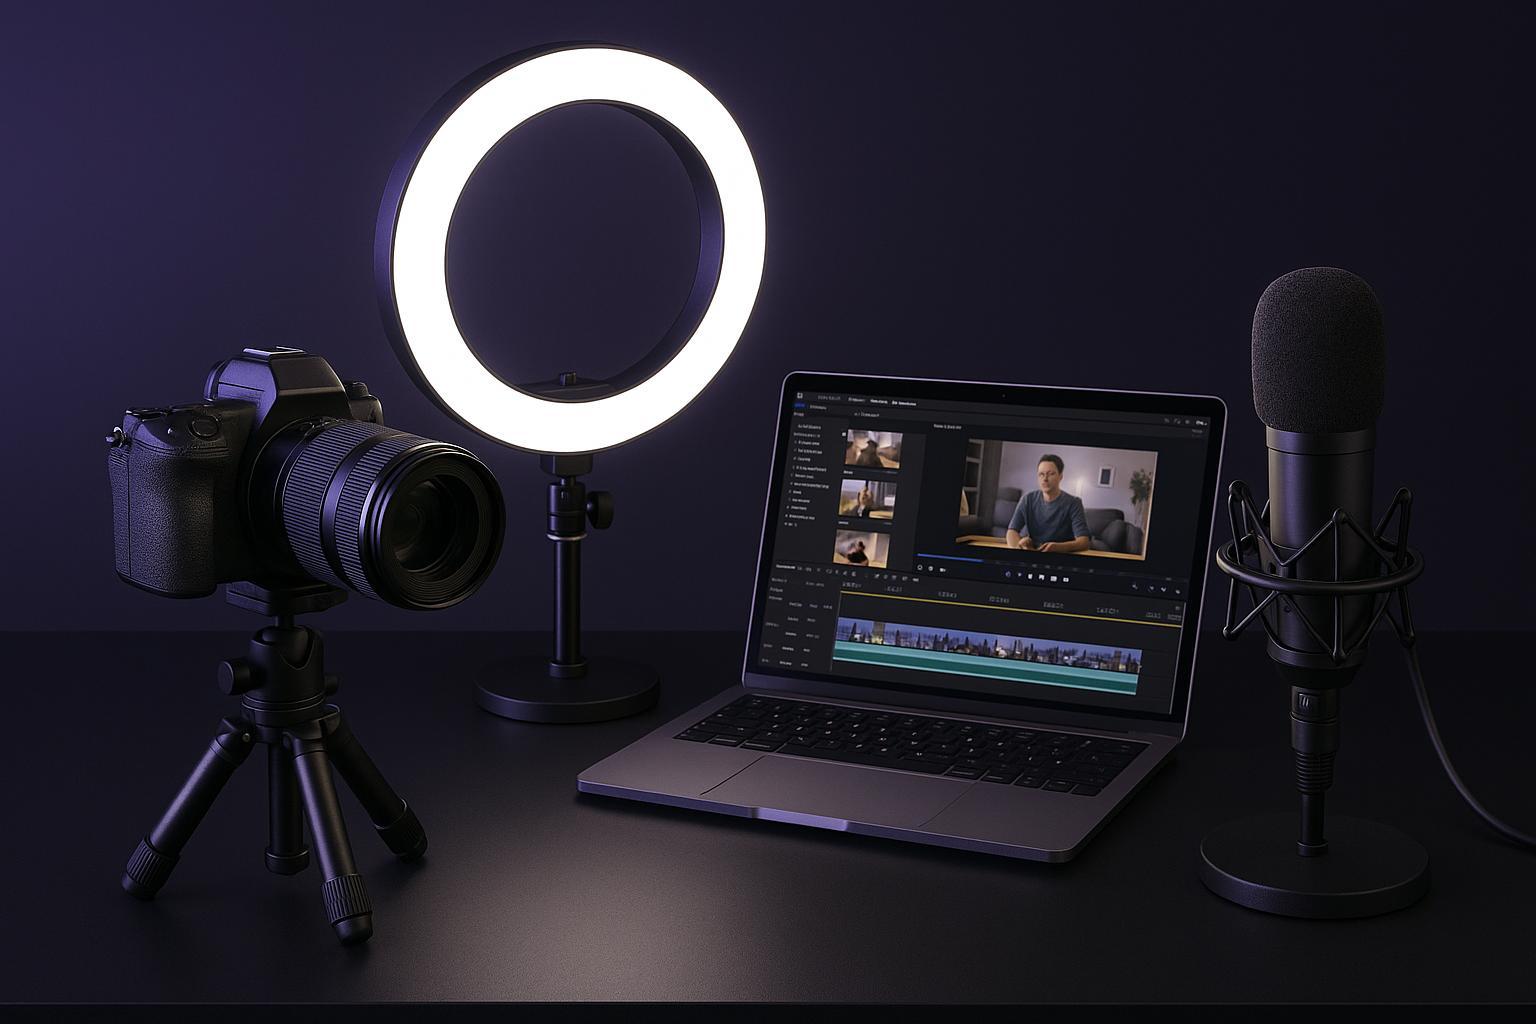
Equipment You Need for Professional Videos
Creating professional-quality videos doesn't have to break the bank. With the right tools, even affordable equipment can deliver impressive results. Let’s dive into the essentials for making your videos stand out.
Cameras and Stabilization
Your choice of camera plays a huge role in the quality of your visuals, but you don’t need the latest and greatest gear to get started. Modern smartphones are surprisingly capable, offering features like 4K resolution, cinematic modes, and enhanced color profiles. Even older models can do the job, though they might lack the manual controls needed for fine-tuning.
If you're ready to step up, mirrorless cameras strike a great balance. They provide manual controls, perform better in low light, and can create that beautiful blurred background effect (shallow depth of field) that makes your subject pop. DSLR cameras are another solid option, offering access to a wide variety of lenses. Keep in mind, though, they tend to be bulkier and may have some recording limitations.
Stabilization is just as important as the camera itself. A tripod is a must-have for steady, stationary shots. For smooth, dynamic movement, a gimbal is your best friend - it’s perfect for capturing professional-looking motion.
Once your visuals are steady, it’s time to focus on audio.
Microphones for Clear Audio
Great audio can make or break your video. Viewers might forgive a slightly shaky shot, but poor sound quality? That’s a dealbreaker. Built-in camera microphones often pick up unwanted background noise, so investing in a dedicated mic is worth it.
Lavalier microphones - those small clip-on mics - are excellent for capturing clear audio, even when you’re moving around. They come in both wired and wireless versions, with options to suit various budgets. Shotgun microphones are another favorite, designed to focus on your voice while blocking out background noise. If you’re recording directly into a computer, a USB microphone is a convenient choice, though it might require some adjustments to manage room acoustics.
You can further improve sound quality by reducing echo. Soft furnishings or portable sound panels work wonders for creating a cleaner audio environment.
With audio sorted, let’s talk about how lighting and backdrops can elevate your production.
Lighting and Backdrops
Lighting can completely transform the look of your video. Good lighting highlights your subject, reduces harsh shadows, and ensures a consistent color tone.
LED panel lights are a versatile option. Many models let you adjust brightness, color temperature, and diffusion, making them suitable for a wide range of setups. Ring lights, popular for social media and talking-head videos, provide even, shadow-free lighting, though they can sometimes create a flatter look. For a more natural and professional vibe, softbox lighting kits are a fantastic choice.
Natural light is another great resource. Position yourself near a window with diffused light, and use foam boards or reflectors to fill in shadows. Just keep in mind that natural light can be unpredictable, changing with the time of day or weather.
As for backdrops, simplicity is key. A plain wall, a solid-colored bedsheet, or professional paper backdrops can keep the focus on you. If you want more flexibility, invest in a backdrop system or seamless paper that allows for digital enhancements during editing. Alternatively, dedicating a neutral-colored wall in your home or workspace as a filming area can be a practical, low-cost solution.
Now that your visuals, audio, and lighting are on point, you’re ready to explore how teleprompters can help streamline your production process.
Using a Teleprompter for Home Videos
Once you’ve got your gear sorted, a teleprompter can elevate your home videos to a whole new level. It allows you to deliver your message smoothly, keep natural eye contact with your audience, and maintain a polished, professional vibe. Let’s break down how teleprompters can simplify your video creation process.
How Teleprompters Work
A teleprompter displays a scrolling script near your camera lens, letting you read your lines while appearing to speak directly to your audience. It’s the same tool used by news anchors and seasoned creators to keep their delivery consistent and engaging.
For home video creators, teleprompters solve common challenges like awkward pauses, forgotten lines, and uneven pacing. They help you stay confident, reduce the need for endless retakes, and keep your tone steady throughout the video. This confidence translates into better audience connection and engagement.
How Evelize Enhances Teleprompter Use
Evelize takes teleprompting to the next level with features designed to make your videos look and feel professional, even when filming at home. Here’s what Evelize brings to the table:
- High-quality video capabilities: With 4K resolution, 60 FPS recording, and HDR support, your videos will look sharp and vibrant.
- Customizable teleprompter settings: Adjust scrolling speed to match your speaking pace, tweak font sizes for easy readability, and switch background colors to reduce eye strain - perfect for longer recording sessions or multiple takes.
- Integrated script management: Easily create, edit, and store multiple scripts within the app. A handy search function helps you quickly find specific content, which is especially useful if you’re working on a series or referencing past videos.
- Social media presets and editing tools: Trim, crop, and optimize your videos for various platforms without needing extra software. Landscape mode is also supported, so you can film in the orientation that suits your audience best.
Setting Up Teleprompter Videos Step-by-Step
Getting started with Evelize is simple, but a good setup is key to creating professional-looking videos. Follow these steps for the best results:
- Prepare your script in Evelize. Write in a conversational tone with short, easy-to-read sentences. Break up longer paragraphs with natural pauses, and add cues for emphasis or timing. The app makes it easy to format and save multiple script versions if you want to experiment with different styles.
- Position your camera and teleprompter. If you’re using your phone as both the teleprompter and camera, the app handles this automatically. For separate camera setups, place your phone running Evelize as close to the camera lens as possible to minimize eye movement while reading.
- Test and adjust settings. Before recording, set a scrolling speed and font size that feels comfortable. Most people read faster than they speak, so it’s worth testing a few speeds. If you’re in a bright room, try different background colors to reduce glare and make reading easier.
- Practice with a short test recording. Use this time to get comfortable with the rhythm of speaking and scrolling. Watch for eye movement and pacing - this practice will help you sync your delivery with the script.
- Record your final video. Evelize’s high-quality recording features let you capture everything in one take. If adjustments are needed, the built-in editing tools make it easy to trim sections and optimize your video for the platform of your choice.
With these steps and Evelize’s features, you’ll be well on your way to creating polished, professional-looking home videos that stand out.
sbb-itb-4a26d6a
Video Production Techniques for Home Creators
Now that you're comfortable using a teleprompter, it's time to dive into the visual aspects that make videos look polished and professional. These techniques focus on smart framing and thoughtful composition, proving you don’t need fancy equipment to create high-quality content.
Framing and Composition
Strong framing can transform a simple home video into something viewers can’t look away from. Start with the rule of thirds: imagine your frame divided into nine equal parts by two horizontal and two vertical lines. Place key features, like your eyes, along the upper horizontal line. This creates a visually pleasing balance.
Pay attention to headroom. Leave just about 1–2 finger widths of space between the top of your head and the edge of the frame. It’s a small adjustment, but it makes a big difference in keeping your shot balanced.
Always position your camera at eye level. Filming from above or below can create awkward angles that distract from your message.
Lastly, think about your background. A clean, simple backdrop keeps the focus on you, while clutter or unrelated items can pull attention away from your content. A little effort in tidying or choosing the right spot goes a long way in creating a professional look.
Editing and Post-Production Tools
Once you've captured quality footage and used a teleprompter for smooth delivery, it's time to refine your video. Editing and post-production transform raw clips into polished, professional content.
Beginner and Advanced Editing Software
If you're just starting, there are free tools that can get the job done without any upfront cost. DaVinci Resolve is a standout option, offering robust color correction and editing tools for free. Mac users can turn to iMovie, which comes pre-installed and provides an easy drag-and-drop interface with built-in templates. For PC users, Windows Video Editor is a solid option for basic edits, transitions, and text overlays, all with a beginner-friendly approach.
As your needs grow, paid software unlocks advanced features. Adobe Premiere Pro (about $20.99/month) is a top choice for professionals, offering multi-track editing, advanced color grading, and seamless integration with other Adobe apps. If you're on a Mac, Final Cut Pro ($299.99 one-time purchase) is another excellent option, known for its efficient rendering and unique features like the magnetic timeline, which keeps your edits organized.
For creators focused on social media, specialized tools can simplify the process. Canva Pro (roughly $14.99/month) combines basic video editing with thousands of templates tailored for platforms like Instagram Stories and YouTube thumbnails. CapCut is a free mobile app packed with trending effects and features like automatic subtitles, perfect for quick edits on the go.
Editing with Evelize
Evelize takes editing a step further by combining teleprompter functionality with built-in editing tools. After recording in up to 4K resolution at 60 FPS, you can trim unwanted parts, crop footage to fit various aspect ratios, and apply platform-specific presets - all within the same app.
These presets are a game-changer for creators juggling multiple platforms. With a single tap, you can format your video for Instagram Stories, YouTube Shorts (9:16), or standard YouTube uploads (16:9). Evelize ensures you can fine-tune your content without sacrificing quality, making it an all-in-one solution for content creators.
Once editing is complete, export settings let you optimize your video for each platform.
Exporting and Sharing Your Videos
Selecting the right resolution and format is key to ensuring your video looks great on your chosen platform. For YouTube, exporting at 1080p (1920×1080) with H.264 encoding strikes a good balance between quality and upload speed. Instagram feed posts often work best in a square 1080×1080 format, while Stories and Reels benefit from a vertical 1080×1920 orientation.
The MP4 format with H.264 encoding is widely supported across platforms like YouTube, Instagram, Facebook, and TikTok. Although MOV files provide higher quality, they result in larger file sizes, which may not always be practical.
Different platforms have specific needs. TikTok favors concise, vertical videos that grab attention quickly, while LinkedIn videos often perform better in a horizontal format with subtitles to cater to silent viewers.
Before publishing, preview your video on multiple devices. A clip that looks perfect on a desktop might appear off on a mobile screen. Testing on both ensures your content delivers a consistent experience for all viewers.
Start Creating Professional Videos at Home
Making professional-quality videos at home is more achievable than ever. With the right tools, techniques, and software, you can turn your home into a functional video production space.
Key Points to Remember
Investing in quality equipment can make a noticeable difference. While creativity and execution are essential, having the right gear simplifies the process and opens up more creative possibilities for your videos.
Start with what you already have. A modern smartphone is often enough for casual video projects, thanks to its impressive camera capabilities. As your skills and needs grow, you can upgrade to more advanced equipment, like action cameras for outdoor shoots or cinema cameras that offer higher resolution and advanced features.
Don’t overlook audio quality - it’s just as important as visuals. For those using mirrorless cameras or DSLRs, noisy autofocus can ruin your sound. Opt for fast lenses (f/1.8 or wider) with silent autofocus motors to avoid interference.
Stay organized. Accessories like the Smallrig VersaFrame camera cage allow you to attach essential tools - such as lights, microphones, batteries, and external storage - directly to your camera, keeping your setup neat and efficient.
With these basics covered, you’re ready to dive in.
Your Next Steps
The best way to improve your skills is to start creating. Pick one video idea you’ve been thinking about and apply what you’ve learned. Focus on the essentials: clear audio, steady visuals, and proper lighting. Even if you’re using just your smartphone, practicing these fundamentals will make a big difference.
For those looking to step up their game, consider Evelize. This app offers a 3-day free trial, giving you access to features like 4K recording at 60 FPS, HDR support, and built-in editing tools. Its teleprompter feature and social media presets make it easy to create content tailored for platforms like Instagram and YouTube.
Set achievable goals, like producing one polished video each week or experimenting with lighting techniques. Remember, even professional creators started with simple setups and improved through consistent practice.
Your home studio is ready, and so are you. Grab your gear, put your knowledge to use, and start filming today.
FAQs
What equipment do I need to create professional-quality videos at home?
To create top-notch videos from the comfort of your home, you’ll want to invest in a few key tools. Start with a high-quality camera, like a 4K DSLR or mirrorless model, to ensure sharp and detailed visuals. Pair that with an external microphone to capture clear and professional-grade audio. A tripod or stabilizer is essential for keeping your shots steady, while LED lights or softboxes can help you achieve flattering and consistent lighting.
To take things up a notch, you might want to add a teleprompter for smoother on-camera delivery, an external audio recorder for even better sound quality, and video editing software to polish your final footage. With these tools, you can create videos that look and sound like they were made in a professional studio - all without leaving home!
How can I enhance the lighting and audio quality of my home videos on a budget?
To make your videos look better, start by using natural light whenever possible. Filming near windows during daylight hours can instantly brighten your shots. Want to step it up a notch? Simple DIY tools like white poster boards or aluminum foil can help reflect light onto your subject, giving it a more even and polished appearance. If natural light isn’t enough, affordable options like LED ring lights or desk lamps can work wonders without costing a fortune.
Improving audio is just as important. Reduce echo and background noise by adding soft items like blankets, rugs, or curtains to your recording area. For an even bigger boost, consider a budget-friendly microphone like a USB condenser mic or a lavalier mic. These small, inexpensive changes can make your home videos stand out without stretching your wallet.
What are some beginner-friendly editing tips to make home videos look more professional?
Improving video quality during editing doesn’t have to be complicated, especially if you’re just starting out. A great first step is to organize your footage and map out your edits to ensure your video flows naturally and keeps viewers engaged.
You can also try some basic editing techniques to elevate your video. For example, using J and L cuts can create smoother transitions between clips, while stabilizing shaky footage helps maintain a professional look. Adding light color correction can make your visuals pop without overdoing it.
Another way to enhance your video is by trimming out unnecessary parts to keep the pacing tight. Simple effects like fades or text overlays can also add a polished, professional feel. With consistent practice, these straightforward tweaks can significantly improve the quality of your final product.
Related Posts
Ready to Elevate Your Content?
Try Evelize for free and experience the easiest way to create, edit, and share professional videos. Script writing, teleprompter, and powerful video tools - all in one app!
