Video Recording Checklist: 8 Steps for Professional Results
Video Recording Checklist: 8 Steps for Professional Results
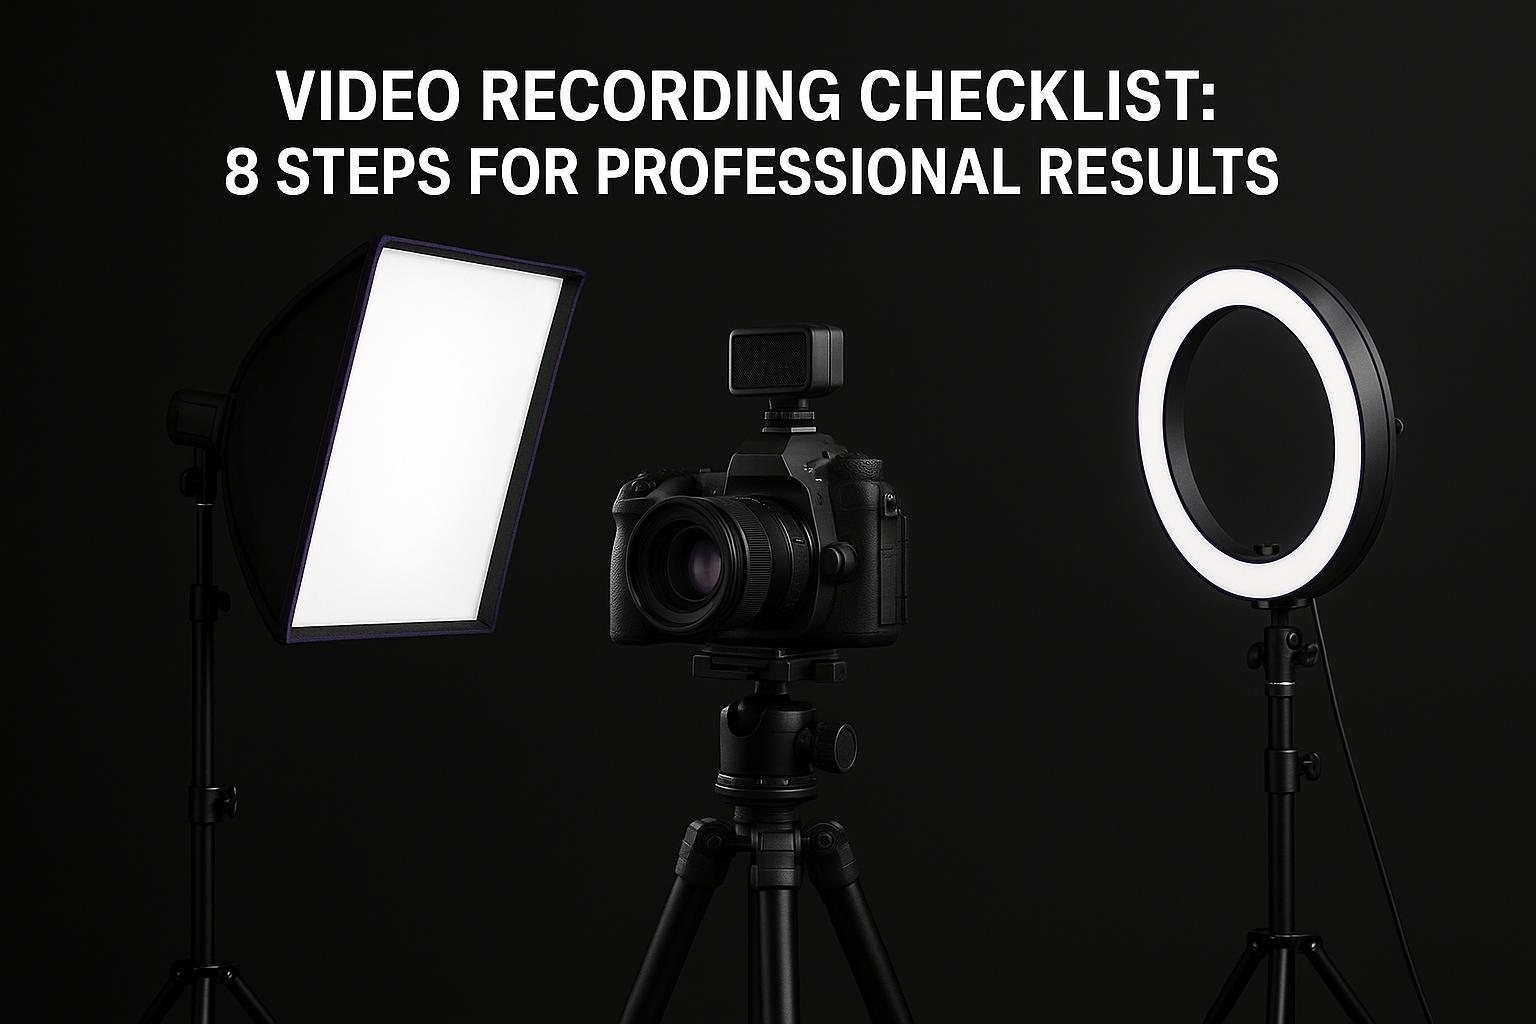
Want professional-looking videos every time? Follow this 8-step checklist to avoid common pitfalls like bad lighting, poor sound, or cluttered backgrounds. With proper planning, you can create polished content without needing expensive gear. Here's a quick rundown of the process:
- Prepare Your Script: Write clear, conversational content and set up your teleprompter for smooth delivery.
- Check Equipment: Test your camera, microphone, and memory cards to avoid technical issues during recording.
- Optimize Lighting: Use a three-point lighting setup to ensure balanced, flattering visuals.
- Set Up Audio: Choose the right microphone and create a quiet recording space for clear sound.
- Tidy Your Background: Declutter and align your set design with your video's message.
- Test Everything Together: Run a full technical rehearsal to ensure all systems work seamlessly.
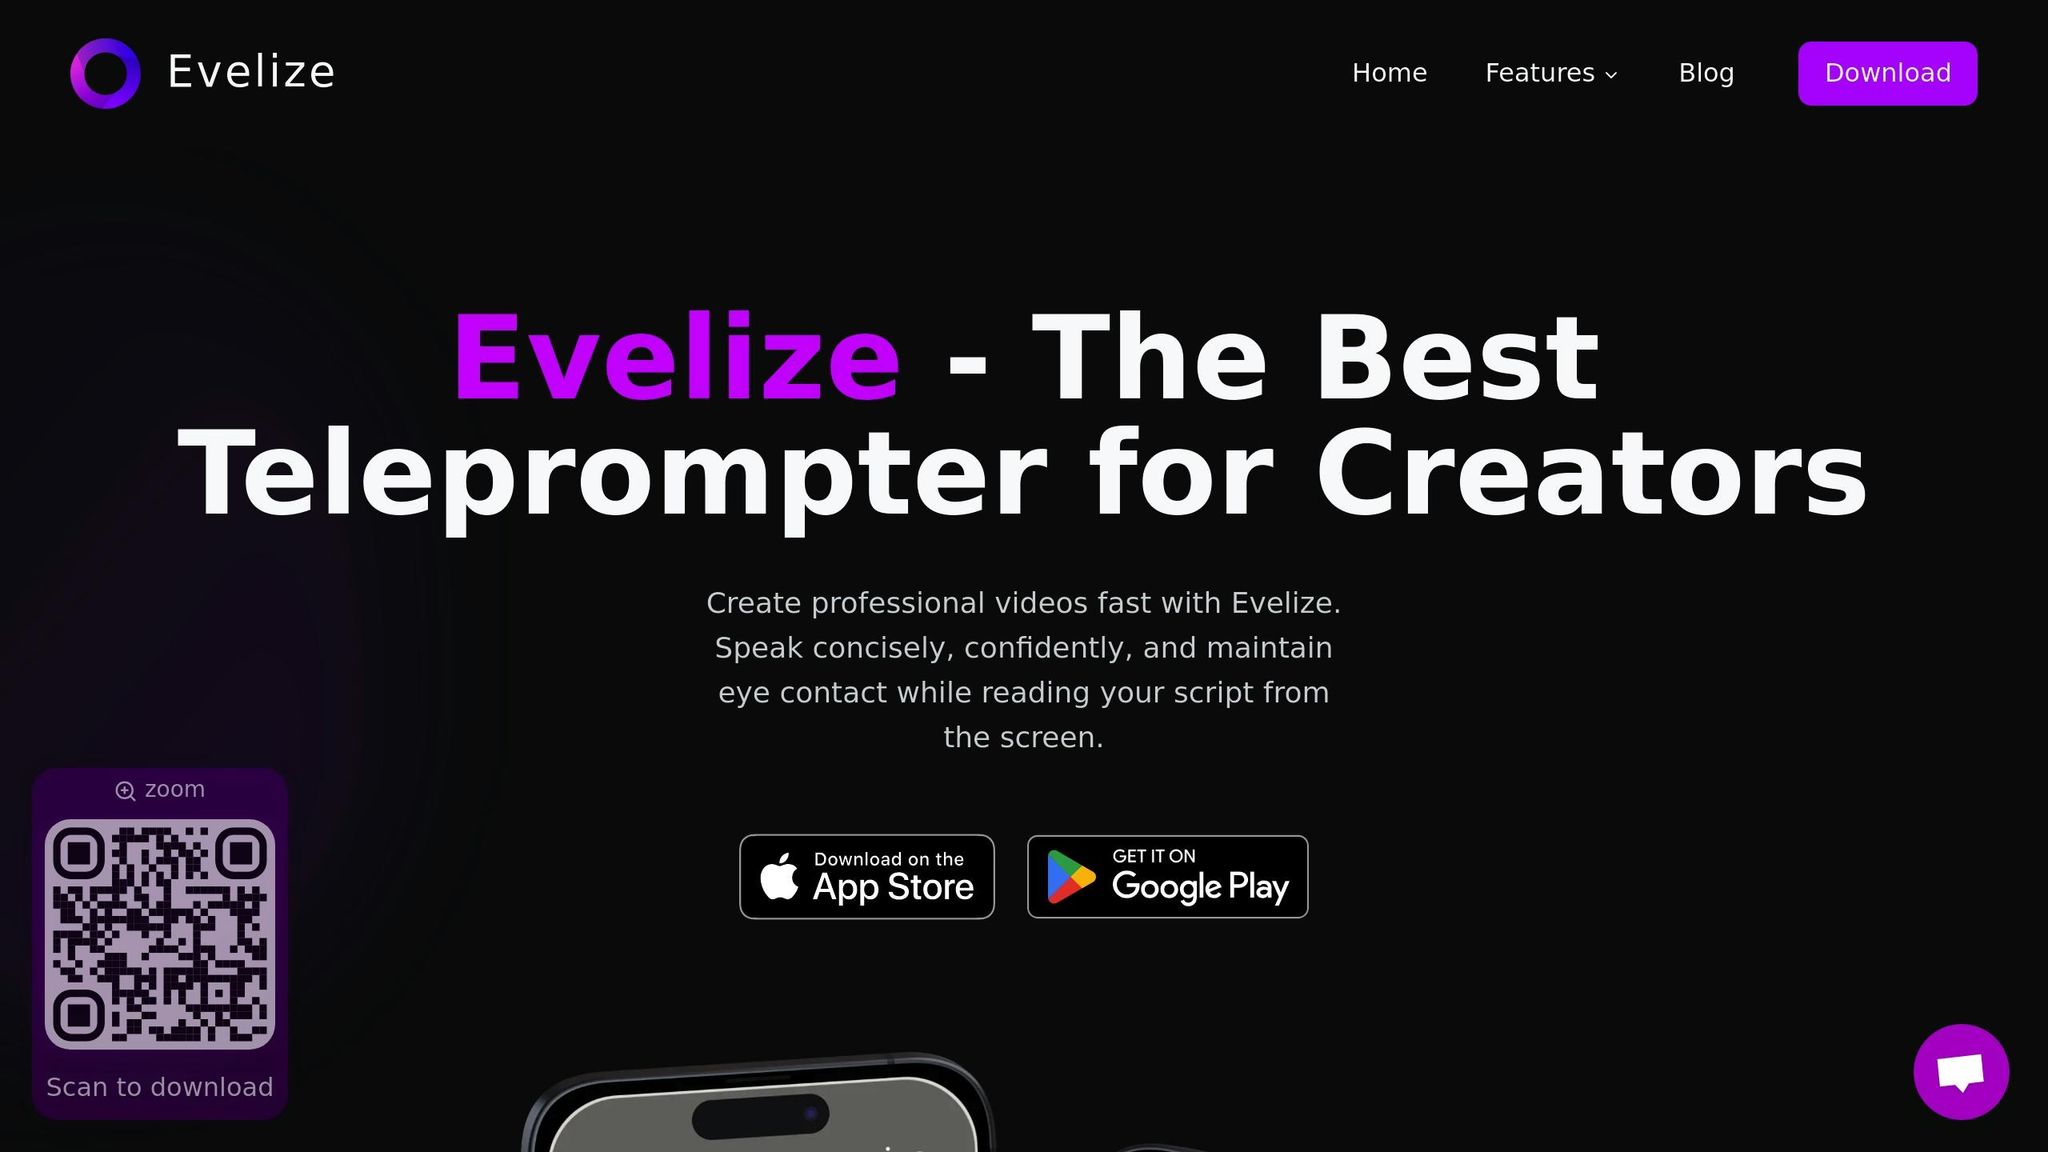
- Use a Teleprompter App: Tools like Evelize simplify script management and ensure smooth delivery.
- Record with Confidence: Maintain good posture, monitor live feeds, and capture multiple takes.
Preparation is key. Spending 15–20 minutes on setup can save hours in editing and ensure your videos look and sound professional. Follow these steps to create content that resonates with your audience.
8 Step Checklist for Filming (BEFORE You hit Record!)
Step 1: Set Up Your Script and Teleprompter
A well-prepared script paired with a teleprompter can keep your delivery smooth and natural, reducing the chances of losing focus during your recording.
Write a Clear Script
When crafting your script, aim for a conversational tone that feels natural. Avoid overly formal language or complicated sentences, as they can make your delivery sound stiff. Reading your script out loud is a great way to catch any awkward phrasing or unnatural flow.
Stick to short sentences - they're easier to read on a teleprompter and help maintain a steady rhythm. Use clear transitions to guide your viewers through the content. Phrases like "Next, we'll cover…" or "Let’s dive into…" can make your presentation feel more structured and engaging. Don’t forget to include cues like "[pause]" to control pacing and emphasize important points.
Keep your audience in mind as you write. If you're creating educational content, break down technical terms in simple language. For marketing videos, focus on how your product or service benefits the viewer rather than diving into features. The goal is to make the script feel like a friendly conversation, not a formal lecture.
Adjust Teleprompter Settings
Fine-tuning your teleprompter settings can make a big difference in your recording experience. Start by choosing a font size that’s easy to read without straining your eyes. If the text is too small, you might squint or lean forward; if it’s too large, you could end up scrolling constantly, which can be distracting.
Set the scrolling speed slightly slower than your speaking pace. This gives you time to deliver your lines naturally without feeling rushed. And remember, you can always pause the scrolling if needed.
Pay attention to the background and text contrast as well. A black background with white text is often the easiest on the eyes, especially for longer sessions. If you're in a brightly lit environment, consider using a dark gray background to soften the contrast and reduce glare.
Once your teleprompter is set up, you’re ready to take advantage of tools like Evelize for managing your script.
Use Script Management Tools
Evelize simplifies script management, making your workflow smoother and more efficient. Its search feature allows you to quickly find specific sections, while its organizational tools help you manage multiple versions of your script with ease.
With a 4.8 out of 5 rating from 104 users on the Apple App Store, Evelize has earned its reputation as a reliable tool for creators. Its real-time editing capabilities mean you can tweak your script directly within the app without switching between programs, keeping your focus on the task at hand. Plus, its backup features ensure your scripts are always secure and accessible.
Step 2: Check and Set Up Your Equipment
Once your script and teleprompter are ready, it’s time to focus on your equipment. A smooth recording session depends on everything running perfectly, and nothing derails that faster than a dead battery or a full memory card. Taking the time to check your gear beforehand can save you from unnecessary headaches and keep your video looking polished and professional.
Check Your Gear
Start by turning on every piece of equipment you’ll use - your camera, microphone, lights, and teleprompter devices. Look for any error messages, confirm battery levels, and ensure all cables are securely connected.
Make sure your memory cards are formatted and ready to go. Keep extra batteries fully charged and within reach, so you’re not scrambling mid-shoot.
Test the stability of your tripod by giving it a gentle shake. Tighten any loose screws and adjust the height to ensure your shot remains steady and level.
Double-check your teleprompter setup. Confirm it’s charged, update the app if needed, and load your script properly. If you’re using a remote control or foot pedal, test those, too, to avoid interruptions during filming. This thorough gear check ensures everything runs smoothly when it’s time to hit record.
Adjust Your Camera Settings
Proper camera settings are key to capturing consistent, high-quality footage. For a cinematic effect, set your frame rate to 23.98 fps for regular scenes, and switch to 60 fps for slow-motion shots. Use a resolution of 3840 x 2160 UHD for sharp, detailed visuals.
| Camera Setting | Recommended Specification |
|---|---|
| Frame rate | 23.98 fps (standard), 60 fps (slow motion) |
| Image resolution | 3840 x 2160 UHD |
| White balance | Match your lighting setup |
| Focus mode | Manual (to maintain consistent focus) |
Match your white balance to your lighting setup to avoid color inconsistencies, and use manual focus to keep your subject sharp without any distracting shifts. These small adjustments can make a big difference in the final product.
Stick to U.S. Standards
For consistency and ease of use, align your settings with U.S. standards. Use feet and inches for measurements, set the date format to MM/DD/YYYY, and export your files as H.264 (.mp4) for web use or ProRes 422 HQ (.mov) for archival purposes.
Setting these standards from the beginning keeps your workflow organized and ensures your content is consistent across all platforms.
Step 3: Set Up Proper Lighting
Once your equipment is ready, the next step is to focus on lighting. Good lighting can elevate your video quality, making it look polished and professional. On the other hand, poor lighting can lead to harsh shadows, washed-out details, or a dim and unappealing look. A well-thought-out lighting setup ensures you appear clear and engaging on camera.
Use Three-Point Lighting
The three-point lighting technique is a go-to method for achieving a professional look. It uses three different light sources to add depth and reduce unflattering shadows around your subject.
- Key Light: This is your primary light source. Position it about 3–4 feet away at a 45° angle from your face. It should be the brightest light in your setup, providing the main illumination for your features.
- Fill Light: Place this light on the opposite side, also at a 45° angle, but at half the brightness of the key light. Its role is to soften the shadows created by the key light, keeping some natural depth without making the image look flat.
- Backlight: This light sits behind you, aimed at the back of your head and shoulders. Position it 6–8 feet away and slightly elevated. The backlight creates a subtle glow around your silhouette, separating you from the background and giving the shot a polished look.
If you're working with a limited budget, you can improvise using desk lamps with daylight bulbs for the key and fill lights, and a floor lamp for the backlight.
Control Brightness and Color Temperature
To maintain consistent lighting, it's essential to balance both brightness and color temperature across all your light sources. Color temperature, measured in Kelvin (K), determines the "warmth" or "coolness" of the light. Mismatched temperatures can result in uneven or unnatural color tones.
Set all your lights to 5600K, which mimics natural daylight and creates a clean, balanced look. If you're filming near a window, decide whether to use natural light as your key light or block it out entirely to avoid mixing different color temperatures.
Whenever possible, opt for adjustable LED panels over traditional bulbs. Start with your key light at full intensity (100%), set the fill light to about 50%, and adjust the backlight to around 75%.
| Light Type | Position | Intensity | Color Temperature |
|---|---|---|---|
| Key Light | 45° from camera, 3-4 ft away | 100% | 5600K |
| Fill Light | Opposite side, 45° angle | 50% | 5600K |
| Backlight | Behind subject, 6-8 ft away | 75% | 5600K |
Before filming, record a short test video and review it on your camera's screen. Your face should be evenly lit with no harsh shadows under your eyes, nose, or chin. Make any necessary adjustments to balance brightness and color while addressing any unwanted shadows or reflections.
Reduce Shadows and Glare
Even with a proper setup, shadows and glare can sneak into your shot and ruin the visual quality. Hard shadows often result from lights that are too close or too intense, while glare occurs when light reflects off shiny surfaces directly into your camera.
To soften shadows, move your key light slightly farther away or diffuse it by bouncing it off a white surface or placing a translucent material (like a white sheet) between the light and your face.
If you wear glasses, reflections can be a challenge. Try tilting your glasses slightly downward or raising your lights higher to change the angle of reflection. Avoid pointing lights directly at your lenses.
Check your background for reflective surfaces like picture frames, computer screens, or glossy walls. Either remove these items, angle them away from your lights, or reposition your setup to minimize reflections.
Spill light - light that unintentionally falls on your background - can create distracting shadows. To control this, use barn doors (adjustable flaps on your lights) or tape cardboard around the edges to direct the light exactly where you want it. This helps keep your background evenly lit and free of shadow patterns.
Finally, record another short test and review it on a larger screen to catch any remaining issues. Addressing these details ensures your lighting is on point, setting the stage for professional-quality video production.
Step 4: Set Up and Test Your Audio
Once your lighting is dialed in, it’s time to focus on audio. Poor sound quality can distract viewers, no matter how great your visuals are. On the other hand, crisp, clear audio keeps your audience engaged and adds a polished touch to your content. Many creators overlook this step, but getting your audio right can make a world of difference. Here's how to fine-tune your setup.
Pick the Right Microphone
Built-in microphones rarely deliver the quality you need. Choosing the right microphone depends on your recording setup and environment.
- Lavalier Microphones: Perfect for sit-down recordings, these clip-on mics stay close to your mouth, ensuring consistent sound. However, they can sometimes pick up rustling from clothing.
- Shotgun Microphones: Ideal for directional sound capture, these mics reduce background noise and work well when mounted on a camera or boom pole.
- USB Condenser Microphones: Great for desk setups or recording near a computer. These mics provide clear audio but require you to stay within a close range for the best results.
When selecting a mic, think about your recording distance and environment. Lavalier mics are forgiving with movement but sensitive to fabric noise, while shotgun mics need precise positioning. USB condenser mics excel at close-range clarity but may not suit every setup.
Test Sound Quality
Before hitting record, always do a sound check. Record a short test clip at your normal speaking volume and listen to it using closed-back headphones. This helps you catch any ambient noise, echoes, or other issues.
Here’s a quick test: clap your hands once and listen to how long the sound lingers. If you notice significant echoes, you may need to tweak your room’s acoustics before proceeding.
Adjust your microphone placement during the test. Small changes can make a big difference in finding the "sweet spot" where your voice sounds natural and free from room noise. Make sure to test at the same volume you’ll use during your actual recording - this ensures you catch any potential problems that might not show up during quieter tests.
Create a Quiet Space
Your recording environment plays a huge role in audio quality. Start by eliminating noise sources:
- Turn off air conditioning or fans.
- Close windows to block out street noise.
- Silence appliances that create background hum.
To reduce echoes, use soft materials. Hang thick blankets or moving blankets around your recording area as temporary sound dampeners. If blankets aren’t an option, try recording in a carpeted room with curtains and upholstered furniture. Even using a walk-in closet with hanging clothes can work wonders for soundproofing. Avoid spaces with high ceilings, hardwood floors, or large windows unless you can add extra sound treatments.
For a more permanent setup, consider installing acoustic foam panels at reflection points - spots where sound bounces back toward your mic. To find these areas, hold a mirror against the wall while sitting in your recording position. Wherever the mic is visible in the mirror, that’s a reflection point worth treating.
Finally, establish a quiet zone around your recording space. Let household members know when you’re recording to minimize interruptions, mute your phone, and close any apps that might produce unwanted notifications or sounds.
After making these adjustments, record another test clip to see how your changes improved the sound. You should notice a cleaner, more professional tone with reduced background noise and echoes. Your audio will now match the quality of your visuals, creating a seamless viewing experience.
sbb-itb-4a26d6a
Step 5: Arrange Your Background and Set
Once you've checked your gear, lighting, and audio, it's time to focus on your background. A well-thought-out background not only enhances your video but also reinforces your message.
Clean Up Your Space
Start by decluttering. Get rid of anything that doesn’t belong in the frame - think equipment cases, coffee mugs, stray papers, or tangled cables. A clean and organized space creates a professional and polished look. After tidying up, fine-tune your set to make sure it aligns with the tone of your video.
Match Your Set to Your Message
Your background should complement your message, not compete with it. Choose one or two elements that add meaning or context to your content. For instance, if you're filming a business-related video, a neatly arranged desk or bookshelf can work well. Avoid overcrowding the frame and stick to items that reflect your brand or theme.
Check Spacing and Positioning
Once your set looks the part, pay attention to spacing. Keep the focus on you by managing what’s in the foreground. Remove any distracting items that might pull attention away from your message. A clean and intentional setup ensures your audience stays engaged.
Step 6: Configure Evelize App for Teleprompter Use
Using Evelize's teleprompter features can take your video production to the next level, helping you deliver your script smoothly and confidently. Once your setup is ready, it's time to tweak Evelize's teleprompter settings to make your recording process as seamless as possible.
Set Up Teleprompter Controls
Start by tailoring the teleprompter settings to your speaking style. As user selavant advises, "Adjust the scrolling speed to match your speaking pace to avoid awkward pauses or rushed moments".
For easy reading, set the font size between 36–48 points, and choose a background color that reduces glare while keeping the text clear. If you're filming in horizontal orientation, switch to landscape mode for a better view of your script. These adjustments ensure a natural flow between reading and recording, keeping your delivery polished.
Use Script Search and Editing
Evelize's script management tools make it easy to create, organize, and edit your scripts on the fly. With these features, you can refine your content and ensure your delivery feels natural and consistent.
Choose Social Media Formats
When you're ready to share, Evelize simplifies the process with presets for platforms like YouTube, Instagram, TikTok, and LinkedIn. These presets automatically adjust your video's aspect ratio, letting you see exactly how it will look on each platform while you're filming. This eliminates the need for extra cropping later.
As reviewer NexGenSlayer noted, Evelize is "probably the best teleprompter app I've tested and used".
Step 7: Do a Final Technical Test
After checking your equipment, lighting, and audio individually, it’s time to ensure everything works together seamlessly. A full technical test before recording can save you from headaches later.
Test All Equipment Together
Set up your gear exactly as you plan to use it during the actual recording. Position your camera, adjust your lighting, connect your microphone, and have Evelize loaded with your script. Treat this as a dress rehearsal for your setup.
"A test run is a great way to make sure your pre filming checklist is complete" - Primal Video
Take your spot as if you’re about to record the final video. Double-check that your teleprompter is at the right height, your lighting evenly lights your face, and your microphone captures clear and crisp audio.
Next, record a short 10–20 second clip from your script. This quick test gives you a chance to spot potential problems without investing time in a full recording. Speak naturally, keeping the same pace and energy you’ll use during the actual shoot.
Once the test is complete, review the recording immediately.
Record and Review a Test Clip
Play back your test clip right away. Use a good pair of headphones to carefully assess the audio for any background noise, echo, or distortion that might not be obvious through your device’s speakers.
Check the video for sharp focus, proper white balance, and even lighting. Look closely for any distractions in the background or framing issues that could detract from the final result.
If you notice any problems, tweak your setup and record another test clip. Taking a few extra minutes now to refine everything will save you from discovering flaws after the main recording is done. It’s worth the effort to get it right.
Step 8: Start Recording with Best Practices
Once your technical test runs smoothly, it's time to hit record. This step ties together all your preparation with your actual delivery. With your equipment, lighting, and audio dialed in, the focus now shifts to presenting your best performance.
Maintain Good Posture and Eye Contact
Whether you're sitting or standing, keep your posture upright with shoulders relaxed and back. This not only helps you look confident but also ensures your voice projects clearly.
Eye contact is key to connecting with your audience. Look directly into the camera lens, not at the teleprompter or your own image on the screen. This gives viewers the impression that you're speaking directly to them. If you're using Evelize, position the teleprompter text as close to the camera lens as possible to minimize eye movement between reading and addressing the audience.
Let your facial expressions feel natural and engaging. Smile when it fits the tone, and let your personality shine. Keep in mind that the camera can make emotions appear muted, so dial up your expressions slightly to maintain a lively and engaging presence.
Monitor Live Feeds
Keep an eye on your live feed during recording. Most cameras and smartphones have a live preview screen that shows exactly what you're capturing. Use this to check that you're staying in frame and maintaining focus.
Pay attention to audio levels in real time. If the levels dip too low or spike into the red zone, adjust your distance from the microphone or tweak your speaking volume.
Watch for any technical hiccups, like blurry visuals or shifting lighting. If something seems off, stop and fix it right away instead of relying on post-production to solve the problem. Regular monitoring ensures your recording stays on track from start to finish.
Record Multiple Takes
Even if the first take feels flawless, record several more. Having multiple versions gives you options during editing and ensures you have backups in case of technical glitches.
Experiment with your delivery between takes. Try adjusting your pacing, emphasizing different points, or varying your energy levels. Sometimes, a more relaxed or spontaneous approach can resonate better than a formal tone.
If you make a minor mistake, keep going and finish the script. Often, a take with a small stumble can still turn out to be the best overall. With Evelize's editing tools, you can easily cut out errors or combine the best parts from different takes.
Aim to record at least three full takes. This gives you a solid choice, a backup, and often an unexpected favorite that captures something special you didn’t anticipate.
Conclusion: Get Consistent, Professional Results
This checklist transforms video recording from a guessing game into a streamlined process. Preparation is the backbone of creating polished video content - when your equipment, lighting, audio, and script are dialed in, everything else falls into place. With each step, you're reinforcing a methodical approach that ensures consistent quality.
Using this checklist regularly not only reduces mistakes but also slashes editing time. The first few times might feel a bit slow, but as you get into the groove, you'll breeze through the steps with confidence. Many creators find that investing just 15–20 minutes in preparation can save hours in post-production.
Evelize brings together script management, a teleprompter, and recording tools, offering features like customizable scrolling speeds, social media presets, and 4K quality. These tools let you focus on delivering your message, not fumbling with settings.
Each recording session is an opportunity to fine-tune your process. Take note of what works best for you - whether it's the ideal lighting position, the perfect mic placement, or the smoothest teleprompter speed. Over time, these small tweaks add up, taking your videos to the next level. Every session makes your workflow sharper and more efficient.
It’s important to remember that professional-looking videos aren't about having the fanciest gear - they’re about making the most of what you have. This checklist gives you a proven system to do just that, helping you consistently produce engaging, high-quality videos that resonate with your audience.
FAQs
How can I write a script that feels natural and keeps viewers engaged during video recordings?
When crafting a script that feels natural and keeps viewers hooked, focus on using a conversational tone and steer clear of complicated language or jargon. Kick things off with a strong hook in the first 10–15 seconds to grab attention right away. From there, structure your script with a clear flow: an engaging introduction, the main points, and a conclusion that ties everything together.
Make sure to read your script out loud during the process. This helps you ensure it sounds natural and flows like everyday speech. Adjust the wording if it feels stiff or unnatural, and leave some space for improvisation - it can make your delivery more relatable and authentic.
What are the best ways to adjust teleprompter settings for a natural and professional video delivery?
To deliver your message naturally and professionally with a teleprompter, start by setting it at eye level. This ensures you maintain direct eye contact with your audience, creating a strong connection. Adjust the font size so it’s easy to read - large enough to prevent eye strain but not so oversized that it cuts off sentences or disrupts your flow. Aim for a reading pace of about 150 words per minute, though this can vary based on your personal speaking style.
Make sure the scrolling speed aligns with your natural rhythm. Practicing reading slightly ahead of the text can help you maintain a seamless delivery. Also, tweak the brightness and contrast so the text is sharp and easy to read without being overly harsh or distracting. These small adjustments can make a big difference in helping you speak with confidence and keep your audience engaged.
How can I ensure my video recordings have clear, professional-quality audio?
To get crisp, professional audio for your video recordings, start with a dedicated external microphone. Place it close to your subject - about 6 to 10 inches away works best. Choose a quiet location with minimal background noise, and to cut down on echo, consider adding soft furnishings or soundproofing materials.
Always monitor your audio with headphones while recording. This way, you can catch and fix any issues right away. If possible, opt for a wired microphone instead of a Bluetooth one. Wired options tend to be more reliable, avoiding interference and delivering consistent sound quality. These simple tweaks can noticeably elevate the clarity and overall quality of your audio.
Related Posts
Ready to Elevate Your Content?
Try Evelize for free and experience the easiest way to create, edit, and share professional videos. Script writing, teleprompter, and powerful video tools - all in one app!
